
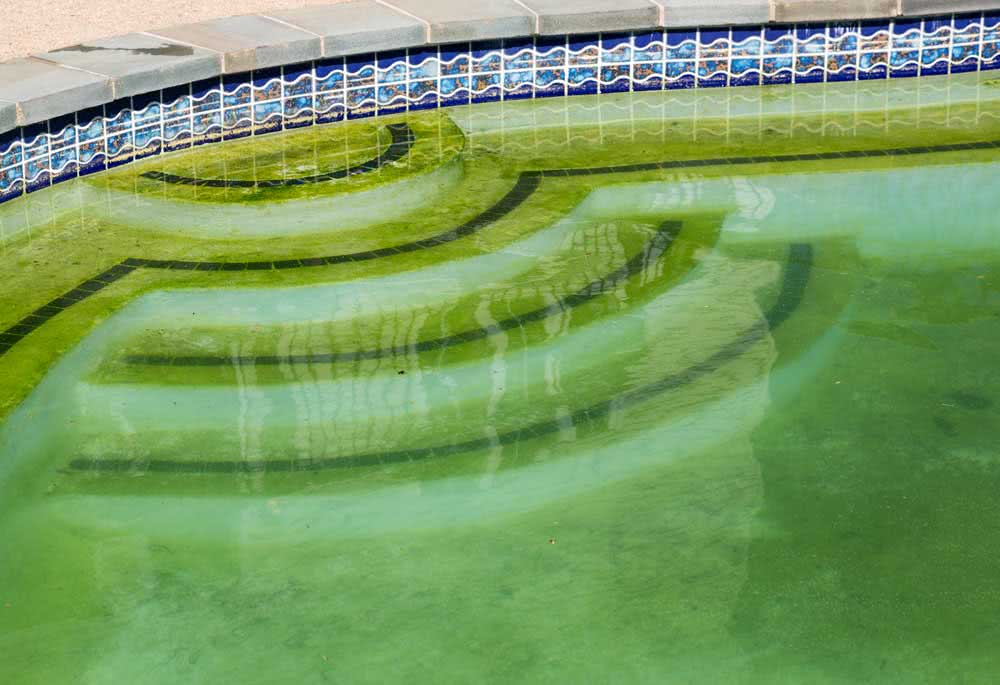
Swimming pool with green water is not a good sign. This is almost always an indication that the water is not being treated properly.
But do you know why the pool water turns green? Do you know how to treat it and prevent this problem from recurring?
We’ll tell you everything in this post. Come and see.
Why does the pool water turn green?
There are two main reasons for this: the first (and most common) is the proliferation of algae and micro-organisms, also known as slime or slime.
The second cause of green water is inadequate treatment, which can result from the excessive use of chemicals.
Is it bad to swim in a pool with green water?
Yes. This change in water color is harmful to the health of bathers, since the presence of algae induces the contamination of the pool by bacteria, which can cause irritation, infections and allergies to the skin, eyes and ears, in addition to diarrhea, respiratory problems and even conjunctivitis.
How to clean green pool
Cleaning a pool with green water requires a series of care and procedures.
But before that, the first step is to identify the cause of the problem. This is because if the reason for green water is the excess of chemical products, then the correction will be made first by neutralizing these products, as they can impede the action of other substances used in cleaning.
Then, the cleaning process should be the same as for algae infestation.
Check out the step by step below:
1. Physically clean the pool
The first step is to clean the pool thoroughly. To do this, use the sieve and remove the larger and solid dirt, such as branches, leaves, insects and other residues.
This step is very important, since the presence of these debris contributes to the proliferation of more algae, in addition to clogging the filters, pump and vacuum.
The debris also prevents the full action of the chemicals that will be used for cleaning.
Speaking of which, it is worth mentioning that chlorine should not be added to the pool’s green water before sieving.
And don’t be surprised if the water becomes even more green and turbid, this is normal and to be expected, as the movement in the water ends up displacing the dirt plates that were attached to the edges and on the floor.
2. Manually brush the pool
After performing the entire sieving process, you must brush the entire pool. For this, use a metal brush attached to a rod.
Brush the bottom and all sides of the pool. But the tip here is to start brushing from the sides, since the bottom has a greater amount of dirt that, when cleaned, will make the water more turbid, preventing the view of the interior of the pool. To avoid this situation, start on the sides.
3. Correct pH and alkalinity levels
Brushing done, now it’s time to measure the health of the pool water. For this, you will need a colorimeter testing kit that can be easily found at online stores or physical specialty stores.
With the test kit in hand, first measure the alkalinity of the water. Optimal parameters should be in a range between 80 to 120 PPM. Adequate PH levels, on the other hand, need to be in a range between 7.2 to 7.8.
Alkalinity levels below 80 indicate that the water is acidic. In this case, it is recommended to use an alkalinity elevator based on sodium bicarbonate. If the levels are above 150, use an alkaline reducer.
However, if the measurement indicates alkalinity levels between 120 and 150, no treatment is necessary, since the water treatment itself will stabilize the indexes.
After applying the products, wait about six hours. After that time, take the PH measurement. The pH of the water should only be treated after correcting the alkalinity. That’s because it tends to balance itself naturally with the treatment.
If you find a PH above 7.8, use a PH reducer (the same used to reduce alkalinity), but if the result shows levels below 7.2, then it will be necessary to raise the PH using a product known as keel.
4. Decant
The next step in cleaning the pool’s green water is decanting. This process consists of chemical cleaning of the water, eliminating the existing algae and micro-organisms.
At that moment, a product known as a clarifier is used. To enhance the effect of the product, turn on the pool pump in the retrocircular function, so that the water moves and allows the chemical particles of the clarifier to meet the dirt more easily.
This process can also be performed manually with the aid of a rod. In this case, move and shake the water throughout to dilute the product completely.
After an hour, apply an algaecide product (kills algae) and turn off the pump. Wait about 12 hours or a full night for waste to settle to the bottom of the pool. During all this time the water has to stay still.
5. Vacuum the pool
The following day the entire pool must be vacuumed. Use the vacuum’s drain function and be careful not to “lift” the dirt that is deposited on the bottom of the pool. Do this process slowly and carefully.
6. Chlorination
After vacuuming, chlorination of the pool must be carried out, that is, the application of chlorine-based products. This step serves to completely eliminate any micro-organism that may still be in the water, in addition to contributing to the sanitization of the pool.
For the case of green water, a shock dosage equivalent to 14g/m³ is recommended. Remember to pre-dilute chlorine in a container before applying it to the pool.
7. Clean the edges
Upon completion of the chlorination process, clean the pool edges using a sponge and detergent.
Once this is done, the pool is now clean and practically ready for use again.
8. New PH and alkalinity test
Before releasing the pool, however, perform a new alkalinity and PH test. However, it is very likely that at this time the indices are balanced.
Also take the opportunity to measure residual chlorine levels, as excess chlorine is harmful to human health. Expected rates should be between 0.5 and 5 PPM.
With all levels balanced the pool can now be used.
If you have any questions or are unable to carry out the entire cleaning process yourself, consult a specialized company to carry out the service.
Can you empty the pool for cleaning?
Yes, you can even empty the entire pool, in which case, the cleaning process becomes faster and easier. However, it is not recommended.
That’s because the ground starts to exert pressure around the pool walls, which can cause cracks and cracks, especially those made of vinyl or fiberglass.
Another problem is the large waste of water involved in this operation. Therefore, the most suitable thing is to carry out cleaning.
How to avoid green water in the pool
After everything is clean, all you want is to keep the pool water crystal clear, isn’t it? But for this it is important to take some precautions, write down:
- Make it a habit to filter your pool water daily and keep it moving, even in winter. Standing water is an invitation to algae and other debris.
- Leaves, branches, insects and anything else that falls into the pool should be removed as soon as possible, as these debris decompose and can contaminate the pool water.
- Finally, always check the pH and alkalinity levels of the water and carry out the recommended chemical treatments.
All of this contributes to cleaning and conserving pool water and prevents headaches in the future.


