
Autumn is time for what? Pinion!
And anyone who is in love with this seed knows well that it is only the month of May to arrive for it to start appearing in supermarkets, at fairs and even on city streets.
For those who do not know, the pine nut is nothing more than the seed of a tree called Araucária. This tree, typical of the south and southeast of the country, where the climate is colder, produces seeds every year between the months of May and June.
Sementines that so many people love. It turns out that there is no point in just enjoying eating pine nuts, you need to know how to prepare them correctly.
Therefore, we brought in today's post a basic guide for you to prepare pine nuts, from the choice of seeds to the moment of peeling.
Let's see with us?
Pinion Benefits
Many people know, consume, but few know the health benefits of pine nuts. And, do you know what the pinion is good for?
Pine nuts have anticancer properties, that is, they prevent the appearance of cancer. That's because the seed is rich in a known antioxidant as quercetin.
A study by the Biotechnological Institute of the University of Caxias do Sul, on the other hand, demonstrated that the antioxidant property of pine nuts is also beneficial for the cardiovascular system.
Pine nuts are also a great source of fiber. For every 100 grams of cooked pine nuts, about 12g to 15g are dietary fibers, representing between 48% to 62% of daily needs.
Pine nuts are still a source of vitamin C and vitamin B6.
How to choose pinion
Do you know how to choose pinion? Okay, don't get frustrated. This question is more common than you might think.
But learning how to choose the best seeds is what will guarantee the taste of pine nuts.
So, take note of the following tips so you never again do not know how to choose pinion:
Prefer those on the floor – If you live near araucarias and have the opportunity to harvest pine nuts directly from the source, then the tip is to prefer the seeds that are already on the ground.
This is because when the pine nut is ripe, it detaches from the branches and falls to the ground (it is a seed, remember, right?). When the pine nut is harvested at the top of the foot, it is not always ripe yet.
Coloring – The color of the shell is another indication that reveals whether the pinion is good or not for consumption.
The brighter it is the better. The tone should vary from a brown to a light yellowish brown. Opaque and dark seeds usually indicate an old and out of season pine nut.
Holes: Observe if the pinion shell has holes. If it does, a sign that pets are in there eating the pulp.
How to cook pine nuts
The fastest and most practical way to cook pine nuts is in the pressure cooker, but that is not the only way. Here are all the ways to cook pine nuts:
Pressure cooker
To cook the pine nuts in the pressure cooker, you must first wash the pine nuts well and make a small cut at the tip of the seeds (this helps when peeling).
Also make a small vertical cut to facilitate cooking and check the color of the pulp, it needs to be light, if it is dark, discard it.
Place the pine nuts in the pan and cover with water. Add a pinch of salt, close the pan and cook.
Let it cook for about 30 minutes. Wait for the pressure to come out and check that the pine nuts are soft, if they are still hard, go back to cooking.
Microwave
Did you know that you can cook pine nuts in the microwave? Gives!
First you must peel the pine nuts, wash them and then place them in a bowl (suitable for microwaves) with enough water to cover the seeds. Add a little salt.
Then, take the bowl to the microwave, at full power, for 30 minutes.
Remove and see if the pine nuts are already soft.
Common Pot
The common pan can also be used to cook pine nuts. The procedure is the same as that used for the pressure cooker. The difference is the cooking time, which in this case takes about 1 hour to 1 ½ hours.
Barbecue grill
Another way to cook pine nuts is by using the barbecue. Start by washing the pinion. Then, spread the pine nuts over a metal form and place it on the grill grill.
Turn them sideways every fifteen minutes. After thirty minutes, the pine nuts should be roasted.
The procedure is the same for those with a wood oven. In this case, place the mold on the oven plate and wait for about 15 minutes.
How to peel pine nuts

After cooking the pinion, another step comes that for some is the most difficult: peel the pinion.
But luckily, there are some simple techniques that make this moment much easier. Follow:
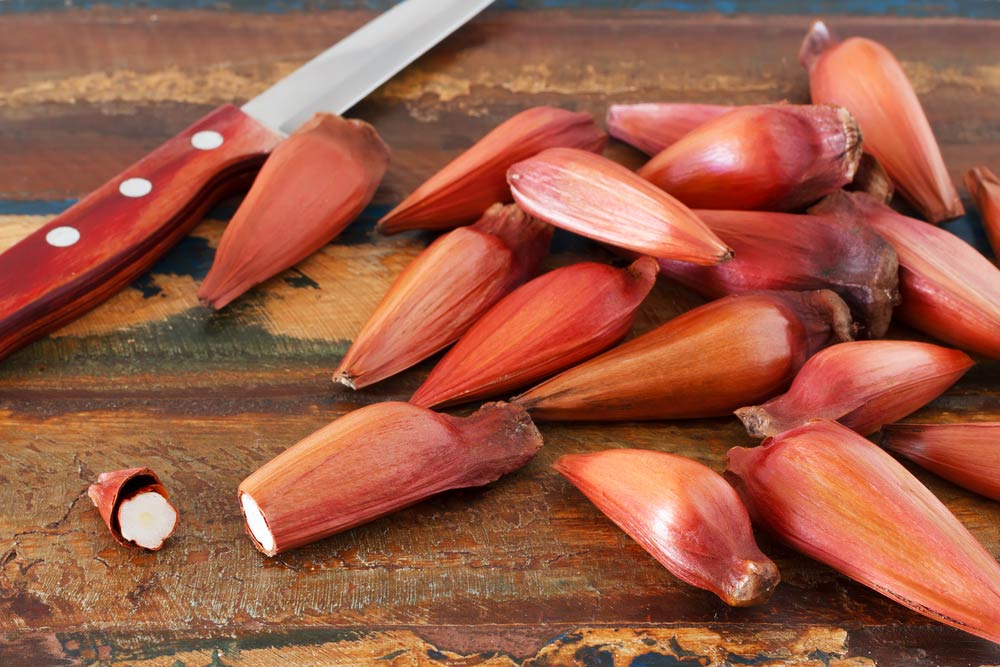
Knife
The knife is the most practical and effective tool for peeling pine nuts. The process is simple: just make a vertical cut in the cooked seed, from one end to the other. Then just remove the pulp.
Tip: use a small pointed knife.
Garlic press
Believe it or not, but you can peel pine nuts with the garlic press. The method of use is the same for squeezing garlic, but this time it is the pine nut that you must fit into the utensil and tighten.
Pliers or hammer
The tools you have in the garage can also help when it comes to peeling the pinion.
In the case of pliers, you must press the pinion on the back with the tool expelling the pulp from inside the shell.
If you prefer to use the hammer, then the process begins before cooking. To do this, give a few taps on the back of the pinion, so the process of removing the shell is made easier.
Use your teeth
The mouth itself can be a tool to peel the pinion. The idea here is to lightly bite the back of the seed so that you can remove the pulp. But be careful not to press too hard and end up hurting your teeth.
Own peeler
Finally, you can choose to have your own pine nut peeler at home. This tool has the sole and exclusive purpose of removing the seed husk. Easy easy!
How to conserve pine nuts
As you already know, pine nuts only in the autumn and winter months. And what to do in the other months of the year?
That is the question that remains for those who are crazy about this little seed.
Some tips can help you preserve the pine nuts for longer, ensuring that you enjoy the taste of the araucaria throughout the year. Follow:
Freeze
The most practical method of preserving food is freezing. And the pinion would be no different.
You can keep the pine nuts in the fridge freezer for up to six months. But for this it is important that it is already cooked and without the peel. Thus, the pinion maintains texture and flavor, in addition to not losing nutrients.
Homemade preserves
Preserving is also a way to keep pine nuts at home longer. You can choose a sweet or savory version of canned pine nuts.
To make salted preserves, you must first cook the pine nuts. Then, peel it and place it in a glass with water and vinegar, plus a little salt.
Cover the glass and bring it to a boil for about ten minutes. The salted pine nut preserves are ready.
But if you prefer to make sweet preserves, that's fine too. In that case, just make a syrup with sugar and add the pine nuts already cooked.
Bearing in mind that in both cases, the glass used for the storage of pine nuts must be thoroughly cleaned.
Now that you know everything about pine nuts, from choosing to preserving, just savor that taste of winter.


